I had a call the other day. A friend had purchased an enlarger and MetroLux from another friend. The sensor in the enlarger, as it turns out, was an oldie. One of the first and probably the oldest one in service. Anyway, by the time the enlarger got to the new home, the MetroLux didn't work with it. To make a long story shorter, the sensor was wired the other polarity and the new owner had delete a sensor extension cable that had a reverse in it. Putting it together as was fixed it.
I tell you this because there might be another one or two of these out there. Morley Baer's old sensor is a candidate for this, but I don't know where that went.
Friday, November 16, 2007
Friday, October 26, 2007
New MetroLux, Oct 2007
Serious thought has gone into manufacturing new MetroLuxs. We have spoken with friends and proponents, customers and colleagues. We are in the process of getting quotes on some of the custom parts that are in a MetroLux. So far so good, but a couple critical pieces are yet to be tallied. As soon as I know, I will let you all know.
Wednesday, September 26, 2007
MetroLux and Deliveries, Sept 2007
The Folks at Metered Light are in the process of deciding whether to make more MetroLux (or is it MetroLuxes, MetroLii, MetroLumens, I don't know). Obviously, there in not a huge demand for darkroom equipment these days. We would hate to leave anybody without a MetroLux if they wanted one. Yet, we cannot stockpile a bunch of them in our closet waiting for the last customer to roll in. There are presently enough units to fill orders and there are a couple units left for lucky customers. What will happen after this is uncertain. It has come up quickly and there are feelings at Metered Light that we should give more notice before we pull the plug production.
Regardless, I don't believe the Remote Sensor will be made anymore and none is available.
Regardless, I don't believe the Remote Sensor will be made anymore and none is available.
Tuesday, September 25, 2007
MetroLux II, How the Memory Works, Problem & Fix
I'll probably put this a couple of places here. I just repaired a MetroLux II for a customer. It had a voltage problem, something we have seen on a couple of units. Not hard to fix. Then I sent it back and that problem was fixed, but the customer questioned the memory. It was giving strange numbers, changing on its own, and the beeper was beeping at the wrong interval. Very odd. Everything else seemed to work.
First thing to know is that the memory can be completely re-initialized by turning on MetroLux while holding SETUP button down. This will load a series of numbers into LUX, TIME, Cal#, etc. They should be 1.1, 1.2, 1.3, 100%, 2.1, 2.2, etc. The second thing to know is that the re-initialize is not complete until you hit EXPOSE the first time. This is true anytime you change any numbers that resided in memory: they are not written to memory until you hit EXPOSE once. Doing this can clear a number of apparently unrelated problems.
First thing to know is that the memory can be completely re-initialized by turning on MetroLux while holding SETUP button down. This will load a series of numbers into LUX, TIME, Cal#, etc. They should be 1.1, 1.2, 1.3, 100%, 2.1, 2.2, etc. The second thing to know is that the re-initialize is not complete until you hit EXPOSE the first time. This is true anytime you change any numbers that resided in memory: they are not written to memory until you hit EXPOSE once. Doing this can clear a number of apparently unrelated problems.
Saturday, September 22, 2007
Tip for printing with a MetroLux II
I was printing yesterday and noticed all my times seemed funny. Turned out, I was printing with Lux 2 and I usually use Lux 1. On my unit, those have different calibration numbers, but they don't need to because I only use one light source. I'm going to change the Lux 1 and Lux 2 calibration numbers to be the same so that it doesn't matter.
Tuesday, August 7, 2007

MetroLux Sensor installation in a Beseler Condenser Head
 A little hard to see, but there are 5 little holes drill in the housing beside the top of the lamp. One hole where the probe sees through is 1/4" and the other 4, or 2 pairs, are 1/8" provide attachment of nylon ties to strain relief the probe wire.
MetroLux Sensor installation in a 12x12 grid
 Here you can see the photo diode looking down on the grid (between grids) on a 12x12. On the other side, stickies, nylon ties, and epoxy hold everything in place.
Sunday, July 15, 2007
MetroLux, Very Early, Update
I recently had a MetroLux (One) come in for repair. It was a very early serial number, the 26th in production. There were issues with reset and the unit seemed to operate very slowly. All other functions performed. We don't get many MetroLuxes (MetroLuxi ?) for repair, they just don't break and I had never seen this before. As bad luck will have it, the percent function had 00 loaded. Don't know how that is possible, but when it happens all bets are off. Restoring this fixed the unit. I discovered that very early ML had no reset, we loaded new units with all the numbers by hand. And finally, the Custom Code Numbers were from 0 - 127, with most of them acting as duplicates.
Bottom line is that if you have a very early unit, you can tell by the Custom Code Number range of 0 - 127. In this case, you have no reset. A good CCN is about 23. See the Q & A and instructions for updates.
Bottom line is that if you have a very early unit, you can tell by the Custom Code Number range of 0 - 127. In this case, you have no reset. A good CCN is about 23. See the Q & A and instructions for updates.
Thursday, June 21, 2007
MetroLux (One) and MetroLux II
Well folks, we've been under cover for a bit. It is hard to have a job and run a business at the same time. There are only two of us. But, as one of us is now unemployed, there is a little more time. I've been learning about blogs a bit, so I thought I'd set up a blog for Metered Light since our website went down with all the info when the webmaster died. We should have backed him up.
Eventually we will have the instruction manuals for MetroLux One and MetroLux II here. Also answers to common questions. Then we will expand into the PocketSpot light meter information. As production comes back to life, we will get our website up, too.
Eventually we will have the instruction manuals for MetroLux One and MetroLux II here. Also answers to common questions. Then we will expand into the PocketSpot light meter information. As production comes back to life, we will get our website up, too.
MetroLux Q and A
Q Why use a MetroLux?
A MetroLux was primarily designed for use with coldlight enlargers. Coldlights have a fluctuating light output that is dependent on temperature mostly. MetroLux monitors the light output continuously and adjusts the exposure in real-time to compensate.
Q Will MetroLux work with other light sources?
A Yes. Although it was designed for coldlights, it works equally well with many light sources: tungsten, quartz, florescent, and the sun although we have had a hard time turning the sun off.
Q Can a MetroLux be upgraded to a MetroLux II (One to a Two)?
A No. Not only is the firmware different, but the hardware is different, too.
Q Can a MetroLux be repaired?
A Yes. We have the parts. Repairs are generally simple, quick, and inexpensive. Probably best to call Karl at headquarters: 415.452.9923 PST
Q Are instructional manuals available on the web?
A Yes. They are available at this blog. See April and May. Maybe I'll figure out the link soon.
Q What are the differences between a One and a Two?
A They look and function pretty much the same. The calibration procedure is different. Two has more memories and is friendlier to use and adjust. Two accepts the Remote Sensor, should you have one (no longer available new). Two has a shutter speed timer included.
Q What is the DIN plug on the front of the One?
A A very few of the first Ones had a DIN on the front. We had plans, but they never happened. It does nothing.
Q What is the screw in the hole on the front of the One?
A This adjusts the frequency and thus the resonance and volume and sound of the beeper. If you don't like the beeper, put tape over the hole beside the hole with the screw.
Q My Metrolux One doesn't reset and doesn't work. What gives?
A Very early Metroluxes didn't have a power on reset. If it doesn't count properly, make sure that all the memory registers have 'proper' numbers in them. The times can have anything, but the percent needs to be between 50 and 200. If it is '00' , this will cause problems.
Wednesday, June 20, 2007
MetroLux II Specs
Guarantees accurate and repeatable print exposures without the use of expensive voltage regulators by turning any printing system (contact or enlarging) into a closed-loop, feedback system. With a strategically mounted MetroLux II® photo sensor monitoring light output during exposure, the MetroLux II® Darkroom Lamp Controller compensates for intensity fluctuations by extending or shortening exposure lengths.
Since 1986, Redlight Enterprises has provided a cost-effective tool to eliminate the problems that photographers faced with voltage fluctuation, coldlight drift, and lamp aging. MetroLux II® is so versatile, it is used by photographers exposing platinum prints outdoors, compensating for cloud cover during exposure.
In 1993, the MetroLux II® Darkroom Lamp Controller introduced many new features:
Expanded time base: 0.1 to 9990 lux or seconds
Dual Calibration Channels w/ Three Memory Locations
Hold/Reset Option during exposures
Built-in Shutter Tester
Remote Sensor/Projection Densitometer Accessory
Compatible with Variable Contrast Heads
Lamp Decay Factoring
Dual Calibration Channels are ideal for use with twin-grid Variable Contrast coldlights. Due to rugged circuitry, no contactors are necessary for use with grid lamps up to and including 12" x 12". Battery-free, Nonvolatile Memories never forget calibration and exposure values.
Built-in camera Shutter Tester times exposures of 1/2000 to 6 seconds on focal plane and leaf shutters.
Lamp Decay Factoring computes light fall-off at the end of each exposure. Now, a "burst" printing of 5 two-second exposures equals a single ten-second exposure.
With the Remote Sensor accessory, projected light intensities can be measured at the easel to help determine contrasts, match grey-values, or automatically recalculate exposures during print-resizing.
Specifications:
Input/Switched Output 110VAC, 60Hz/720 Watts, Max (220V available)
Display 0.5" Red LEDs
Enclosure 2"H x 6.5"D x 8"W
Exposure Range 0.1 - 9990 lux or seconds
Channels 2 Calibration Channels, 3 Memories each
Percentaging Range 25% - 250% of exposure
Repeatability Within 1% (typically better than 0.5%)
Programmable Controls LED Brightness, Metronome, Hold/Reset Option
Photo Sensor On 10' cord
Sensitivity/Peak Response 3200 to 7300 Å/5600 Å
Temperature Range -10º to +60ºC
Accessories:
Remote Sensor For Easel-top projection densitometry
Footswitch 8' cord, operates either Focus or Expose
Additional Photo Sensor 10' cord for additional lamp heads
Zone VI Coldlight Adapter 6' RCA to 3P Din
Tuesday, June 19, 2007
What people say about the MetroLux II.
Teacher and Photographer Al Weber's thoughts on the MetroLux II®
"Best timer available."
"Very bright LED's, compact and sturdy with a honest linear response."
" Accurate, and finally a timer that handles intensity fluctuation in cold light printing."
"Meteredlight is a small, honest and reliable manufacturer that makes real tools, not toys."
Al Weber
Photographer & Author Huntington Witherill's comments:
"The Metrolux timer is deserving of "two thumbs up."
"An invaluable tool for any serious black & white printer."
Huntington Witherill.
Friday, May 4, 2007
MetroLux One Instructions, beginning
MetroLux model one instructions.
Disclaimers
Copyright © 2007 by Metered Light LLC. All rights reserved. Metered Light LLC makes no representations or warranties with respect to the contents hereof and specifically disclaims any implied warranties of merchantability or fitness for any particular purpose. Further, Metered Light LLC reserves the right to revise this publication and to make changes from time to time in the content hereof without obligation of Metered Light LLC to notify any person of such revision or changes.
Operation of MetroLux in the Lux mode requires the installation of a light sensor in your printing lamp. Metered Light LLC is not responsible for such installation nor shall MetroLux or their dealers be held liable for ill effects caused by poor or faulty installations.
MetroLux, A Darkroom Lamp Controller and Metered Light are trademarks of Metered Light LLC. All printed wiring boards, silkscreens, software, and firmware are copyrighted and are property of Metered Light .
Revision 2.3
June 2007
Introduction
Thank you for purchasing a MetroLux Lamp Controller. We believe it is the finest device of its kind. It's a timer, a metronome, a 'lamp controller', and you'll find it to be much more. Installation instructions start below.
The name MetroLux literally means 'metered light'. Because it is a light-based "timer", MetroLux measures light output (Lux) as you print. As you know, all conventional darkroom timers use conventional seconds to control exposure. But what happens when the air-conditioner turns on and the line voltage to your printing lamp drops? Printing with MetroLux in the Lux mode, the scientist next door can brown out the entire city, and your prints will STILL come out just as you planned.
MetroLux is a particular godsend for fine printers with coldlight enlargers. They know a fluorescent-based lamp source can fluctuate from exposure to exposure. A coldlight, warm from constant use, can print up to 1000% heavier than a cold coldlight. MetroLux exposures in the Lux mode vary less than 1/2 %.
Before you can use MetroLux as a lamp controller, you will need to install a photo detector 'probe' into your printing lamp. This allows MetroLux to monitor your lamp's output and thereby control it.
Warning: This MetroLux is equipped to handle lamps up to 720 Watts. DO NOT EXCEED THIS POWER LEVEL. Damage to your MetroLux may result. (MetroLux Lamp Controllers are available for higher wattage lamps. Contact Metered Light.)
Getting Acquainted
To acquaint you with the functions of your lamp controller, plug your enlarger lamp into the AC outlet on the back of MetroLux. Connect the probe into the probe jack, also on the back panel. Turn on MetroLux by pushing the On/Off Switch. See drawing of back panel below.
With MetroLux turned on, we are ready to demonstrate how the probe operates.
Depress the 'Unit" key until the CAL LED is lit. Press the 'Memory' key twice until LED #3 is lit. Turn on your enlarger lamp by pressing the 'Focus' key.
The numeric display will probably read 00. Take the sensor end of the photo probe and move it towards your lamp source (in the negative stage is fine). The closer the sensor gets to the light, the larger the number displayed. The sensor is reading the light intensity.
How The Keys Work
The use of MetroLux will soon become second nature, but first let's examine the use of each key.
On/Off Switch
Located on the back panel, this switch powers MetroLux.
Units
This key selects Lux, Cal, or Sec. The LEDs on the left of the display indicate which mode has been selected. A single push of the key toggles between Lux and Sec (seconds). Holding the key down takes you into the calibration mode.
LUX Primary mode. The printing lamp is monitored; the exposure is controlled.
CAL This is the calibration mode. (See below.)
SEC Secondary mode. Exposures are based on time. Probe is not required.
Memory
This key provides access to the 4 memories of the stack. The LEDs on the right of the display indicate which memory is active.
When in the Lux or Sec modes, the first three of these memories are for exposure 'times'. The fourth is a percentage factor, explained below.
As you push the Memory key, you will see the Memories roll by: #1...#2...#3...#4...and back to #1 again.
When in the Cal mode, the memories serve a different function explained below.
Up/Down
These two keys set the numeric display to the desired number. A brief push of either key will change the display one tenth of one count. Holding the key down will cause the display to count at a moderate rate. To count faster, hold both keys down. The first key down determines the Up or Down. The other key acts as a accelerator and provides an accelerated rate of counting.
Focus
This key turns on your enlarging lamp. The lamp will stay on until the key is pushed again.
Start
This key turns on the lamp and starts the counter simultaneously. This is your printing mode. It can be used in Lux or Sec modes.
You can terminate the exposure at any time by pushing this key.
Footswitch
If you purchased a footswitch, it plugs into the back panel. Depressing the footswitch is the same as depressing the 'Start' key on the front panel.
Beep, Volume Control
When the printing lamp is on, a beep is heard. The beep comes every Lux or second depending on the 'Units' selected. The volume of the beep may be controlled by the adjustment of a screw accessed through the hole on the front panel. As the screw is turned the volume will change as will the pitch. Please note, this adjustment screw rotates 3/4 turn only. The beep can also be turned off entirely. See Custom Code Numbers. Optional louder beeper are available for noisy darkrooms. Also, for those with a hearing deficiency in the higher tones, a lower pitched beeper is available---the "deeper beeper". (Sorry, the deeper beeper is no longer available.)
Thursday, May 3, 2007
MetroLux One Instructions, middle
Calibration
NOTE: Before you calibrate, a probe must be installed in your light source. See installation instructions.
To operate MetroLux with your enlarger, you must introduce the two in a ceremony we call Calibration. Every enlarger has a 'standard' light output. What we need to do is determine the standard light output from your enlarger and inform the MetroLux. Please follow the next steps closely.
EXAMPLE: Hold down the 'Units' key for one second until the Cal LED is lit. The #1 LED (calibration #1) on the right side should also be lit. If not, roll the memory by pushing the 'Memory' key. With each push the display goes from #1...#2...#3... #4...and back to #1 again.
Turn on printing lamp by pressing 'Focus'. (Coldlight people, allow lamp to warm up...five or ten minutes).
Push 'Start'. You are now calibrated. Be sure that LED #1 is lit. Leave the Cal mode by pushing 'Units'. You may never have to calibrate again. More details about calibration are given in Advanced MetroLux below.
One last note about the calibration number. The optimum number is between 10 and 127. If the calibration number falls outside this range, accuracy suffers and MetroLux may make mistakes.
Write your calibration number down. True, MetroLux does have non-volatile memories, but it's still wise to protect yourself from darkroom gremlins.
Should you get a number less than 10, there are three possibilities: the probe is not plugged into the back of MetroLux, your lamp is not warmed up, or the probe is not seeing enough light. In the latter case, you'll have to move the probe. For numbers greater than 127, the probe is seeing too much light and is too close to the source (and is probably too hot).
Advanced MetroLux
Exposure Memories #1, #2, & #3
MetroLux has three of its memories dedicated to exposures. This gives you three different exposures to work with without constantly changing the memory. There are many ways to use these three. Our favorite is to keep the base exposure in Memory #1, the test strip exposure in #2, and our proofing exposure in #3. If all these memories are troublesome, #2 & #3 can be masked. See Custom Code Numbers.
Relative Exposure Control: The Percent Function
When would you use the percent function?
To apply dry-down factors.
The dry-down effect is best explained in The Print by Ansel Adams, page 82.
To wit: most photographic printing papers become slightly darker as they dry, most noticeably in the highlights of the print. To determine the value of this dry-down effect, expose a normal print . If it looks good wet, print another 5% lighter. As it dries it will match your wet print. (Nominal dry-down factors range from 1 to 11%.)
To have MetroLux apply this predetermined dry-down, press 'Memory' key until the % LED is lit. Using the 'Down' key, set the display to 95%.
Press the 'Memory' key again until the #1 LED is lit with your printing 'time' displayed. The #4 LED will also remain lit reminding you that your exposures will now run 5% shorter and the metronome will beep 5% faster. Whenever the % factor is other than 100%, the % function LED remains lit as a reminder.
The % function affects ALL exposures, in Lux or Seconds mode, Focus or Start (exposure). Before work on another negative begins, it is important that the % function be reset to 100%.
To incorporate 'fudge factors'.
You'll notice that the % function has a very large range---50 to 200% (plus or minus one f/stop.) This is much more than necessary for dry-down compensation. Why the overkill?
Consider the negative printed regularly. It would be nice to always use the same exposure for making that print -- regardless of the paper's type, grade, serial number, or age. You would simply pull the negative from your file, transfer the notes from your prior printing into MetroLux, and make the print.
But say you desire an enlargement 20% greater than the notes on your negative sleeve dictate. Use your original exposure with a 120% factor.
Or say you are unhappy with a print made on #3 Oriental. Too flat? Whip out the box of #4, plug the predetermined emulsion speed difference factor into the % function, and print the compensated print.
More Calibration
If you have a second lamp, with a photo sensor installed, it is possible to store its Calibration number in Memory 2.
EXAMPLE: You use a coldlight but sometimes print with a tungsten light. You've already calibrated your coldlight in Memory 1. Now calibrate your tungsten in Memory 2.
To use Memory 2, press the 'Memory' key until LED #2 is lit. Calibrate as with lamp #1.
Remember, when entering Cal mode, whichever calibration number is displayed, 1 or 2, that is the one you were using. Whichever memory is displayed when you leave the Cal mode is the Calibration number you will be using. You cannot leave the Cal mode without being in Memory 1 or 2.
For those of you using two light sources with one MetroLux, there are ways of configuring the wiring so that plugging and unplugging of light sources and probes can be eliminated. You will need a Y-adapter for the probes. See the list of options at the end of the instructions.
MANUAL CALIBRATION
A second way to enter the calibration number is to input directly using the 'Up/Down' keys. With the lamp off, run the display to the calibration number you want. Again, you are limited to numbers between 10 and 127. This feature can be handy if you want the beeps to come at longer or shorter intervals...other than the approximate one second interval achieved through calibration. Say you'd like the beeps to come at two second intervals. To do this, double the calibration number.
Lamp Intensity Monitoring
If you were wondering what happens when MetroLux is in Cal mode-Memory 3, wonder no more. This function displays the lamp intensity as monitored by the probe. It is a real-time readout of the light source intensity. It is the number that MetroLux would store in Memory l or 2 if you were to proceed with the calibration procedure. This number is directly proportional to the intensity of the lamp. If you're using a cold light, you may notice this number change dramatically as your lamp warms up.
Custom Code Number
When MetroLux is in Cal mode-Memory 4, some adjustments can be made to your Lamp Controller. You can: (1) turn the beep off, (2) hide Memories, and (3) control LED brightness.
{Notes inside these brackets refer to the Custom Code Number chart below.}
Beep {B}
Turns the beep off. {B is beep on, dash is beep off.}
Memory {M}
With this adjustment, a push of the 'Memory' key will toggle between Memory 1 and Percent, bypassing Memories 2 and 3. This is convenient when using only one printing exposure. {M is all memories, dash is Memory 1 and Percent.}
LED Brightness {1,2,3,4}
There are four levels of brightness for the LED display. {3 is standard and factory set. 4 is one level brighter. 2 is dimmer. 1 is very dim.}
Your Custom Code Number
Decide on the set-up that you'd like, look up the corresponding bold number in Table 1, and enter the number as explained below.
EXAMPLE: Let's say you'd like the Beep on but want the Memory to toggle between #1 and %, and the LEDs dimmed a little.
Keep the Beep...that's a B. Toggle the Memory...that's a dash. Dim the LEDs...that's a 2 on the end. Get the order correct. Look up 'B - 2 ' below.
Here it is again in table form.
function choices example
Beep B - B
Memory M - -
LED Brightness 1 2 3 4 2
Custom Code Number Selection.
If we take 'B - 2' below, we can look up the custom code number. Going down the list we find that it is equivalent to 13. This is the number we wish to install in Memory 4 of the Cal mode.
In the Cal mode, go to Memory 4. Enter '13' into the display using the 'Up/Down' keys. (See Figure 7.) Simple. The lamp need not be on.
Cal Mode, Custom Code Number
00 - M1
01 - M2
02 - M3
03 - M4
04 - - 1
05 - - 2
06 - - 3
07 - - 4
08 BM1
09 BM2
10 BM3
11 BM4
12 B - 1
13 B - 2
14 B - 3
15 B - 4
Table 2. Custom Code Numbers
Jot down your favorite custom code numbers for future use. This can save a lot of time later. (The 'factory set' custom code number is 11.)
Memory Reset
The table below shows the location and use of all seven (7) memories in MetroLux, their names, and their factory preset value (bold numbers). You may reset these numbers at any time. To do so, turn on MetroLux while depressing the 'Units' key. Pressing the 'Start' key places the numbers into non-volatile memory. If you want your old numbers back, turn off MetroLux before pressing the 'Start' key. When you turn MetroLux on again, the original numbers will still be there.
Cal Mode Printing Mode
# 1 Calibration 1 (16) Lux/Sec 1 (1.6)
# 2 Calibration 2 (16) Lux/Sec 2 (1.6)
# 3 Light Intensity Lux/Sec 3 (1.6)
# 4 Custom Code # (11) Percent (%) (100)
Very Early MetroLuxes (serial numbers a little larger than 923)
These MetroLuxes don't have a power on reset. Here is how to tell if you have one these 'very earlies'. Go to the Custom Code area and see if the range is 0 to 15 or 0 to 127. The latter is a 'very early'. Fear not. These work fine, but have spots for features that were never incorporated. The Custom Code numbers are the biggest problem and I don't have the table anymore (It is in an old Mac computer. If you have a table and could make a copy for me, that would be slick.)
Here is how the old table worked. There are four controls: count by tens/halves, one or three time memories, beeper on or off, and 4 brightness levels.
Brightness levels change every count. 3 is brighter than 2 is brighter than 1 is brighter than 0. This repeats all the way up to 127. Brightness is bit 0 and 1 (if you know the binary here).
Bits 2 and 3 don't control anything and thus everything repeats with these bits.
Bit 4 is the Beeper on/off. So the beeper is off from 0 to 15 and then on from 16 to 31, etc.
Bit 5 is the Memory, either one or three. Memory is all on from 0 to 31 and only one from 32 to 63, etc.
Bit 6 is the count by 0.5 or 0.1 settings. Counting by 1/10 with the custom code number from 0 to 63 and counting by 1/2 from 63 to 127.
The old factory settings on these units was 20, but I like 23 for brighter LEDs.
If the unit acts weird, make sure the percent is between 50 and 200.
Thanks to Paul Rice for this lesson with older Metrolux units.
Tuesday, May 1, 2007
MetroLux One Instructions, end
Options
MetroLux has a variety of different light sensors available for all kinds of light sources and configurations. If you don't see what you need, drop us a card with information about your special needs. Standard equipment currently available for MetroLux is listed below.
LIGHT SENSORS
THE STANDARD LIGHT SENSOR. This sensor is attached to a 72" cord. The sensor end you will permanently attach to your printing lamp, the free end is plugged into the back of the MetroLux.
ZONE VI ADAPTER. This is not a sensor, but a 72" cord that adapts MetroLux to the Zone VI cold light.
LIGHT SENSORS FOR DUAL GRIDS. For those using dual grid (two tube) cold lights , you may wish to use two sensors and a Y-connector that 'adds' the light together.
EXTRAS
FOOTSWITCH. A footswitch with a 72" cord is available. We find it very convenient. It can be used to operate either the Focus or Start key. This choice was made at the time of purchase.
EXTENSION CORDS. Sometimes it's further from you light source to MetroLux than you think. If you need an extension, we offer a 72" probe-extension cord.
Y-ADAPTERS. For use with dual grids or when using MetroLux with two light sources.
Final Reminders
Care and Maintenance
MetroLux should be maintenance free. It is internally fused for you and your equipment's protection. If you feel that a fuse is blown, DO NOT ATTEMPT TO REPLACE IT YOURSELF. Refer all internal maintenance to qualified personnel.
Never open, dismantle, disassemble, modify, or insert anything into MetroLux.
If you'd like to clean MetroLux, we recommend a damp cloth and a mild soap. If necessary, the light sensor window may be cleaned with ethyl alcohol.
MetroLux runs best on 120 volts AC at 60 Hz. That's normal in the USA. For your protection, be sure MetroLux and your light source are grounded--don't defeat 3-prong plugs.
There are no batteries in MetroLux.
Obey the warning below and your MetroLux should be happy for a long time.
WARNING: METROLUX SHOULD NOT BE USED WITH LAMPS RATED OVER 720 WATTS RESISTIVE LOADS. DERATE FOR REACTIVE LOADS. CHECK YOUR LAMP'S WATTAGE. IF YOU'RE NOT SURE, FIND OUT. IF YOU NEED A HIGHER POWER RATING FOR YOUR LAMP, USE A CONTACTOR.
Appendix A
Installation Instructions
MetroLux was designed mainly to overcome the problems of light output fluctuations associated with coldlight printing lamps. It will work fine with all light sources that do not exceed the 720 watt power requirement. However, certain precautions must be followed when installing the probe in the light source.
(The probe is packed in a separate plastic bag. It has a plug on one end and a probe on the other.)
A. Unpack MetroLux (MetroLux, probe on 72" cable, plastic strain relief, 4 nylon cable ties).
B. General installation instructions for ALL LIGHT SOURCES:
* Always strain relief the probe such that a tug from the outside cannot damage the tube or other parts of the printing lamp.
* Tie probe wire out of the way. As the enlarger moves up and down, be sure that the probe wire is not pulled or damaged.
* Avoid exposing probe or wire to heat. If it's too hot to touch, it's too hot for the probe (probe temperature range is -15¡ to 140¡F). With some quartz and tungsten lamps, the probe wire will need to be mounted on the outside of the housing away from heat. In this case, the probe can view the light through a small hole drilled several inches from the source. See below.
* The probe's-eye-view is very sensitive to changes in position. The probe should have a clear view of the printing lamp and not be allowed to move.
* Sound pretty complicated? It's very simple. We've installed many probes in all kinds of lamps without problems. If you have problems, drop us a line.
C. FOR COLDLIGHT HEADS: Below is an installation technique we have used for the Aristo D-2 coldlight. The is the most common coldlight. If you have another type, read these instructions for tips on installation in your coldlight. Read the instructions through once before starting. Simple tools and a handyman's logic can perform the operation.
Tools: pencil, masking tape, screwdriver, electric drill with 1/8" and 3/8" bits.
1. Disconnect the power chords and remove the coldlight head from your enlarger.
2. Mark the relative orientation of the cap and bottom of the coldlight with a pencil.
3. Remove the small screws on the side of the coldlight. Lift the cap off the coldlight.
4. Mark the location on the cap where the hole will be drilled. It must be located on the top such that the probe wire will clear the transformer beneath the cap.
5. Drill the hole with 1/8" bit and then widen the same hole with the 3/8" bit.
6. Clean the hole of any burrs and remove shavings from inside the lamp housing from inside the lamp housing.
7. Feed the probe wire through the hole in the cap. Now pass the probe end through the opening on the fluorescent tube mount board towards the tube itself.
8. Look closely at the probe and note which side "sees". It is the side with the shiny square eye. With eye away from fluorescent tube, strap wire to the tube near the center of the cold light grid with nylon cable ties at both 1/4" and 1" distance from probe. From here the sensor can see the 'average intensity' of the light. Pull snug and clip away the excess ties. (Some hi-intensity cold lights may run TOO HOT for this strapping technique. Check the 'on-temperature' of your tube.)
9. Realign cap on lamp; spin in the screws.
10. With the lamp reassembled, take up slack in probe wire by gently pulling excess wire out of cap. Take the strain relief (the strain relief is the odd-shaped, black thing in the plastic bag that the probe came in) and with the wire laid into the larger piece, force the other side in so that it clamps ('pinches') the probe wire. Use a pair of pliers to squeeze and snap this strain relief through hole. See Figure 2A.
D. HELP FOR TUNGSTEN AND QUARTZ LAMPS
As a means of fastening the light sensor to some tungsten and quartz lamp houses, we have used the hole pattern not shown below. With these holes, the probe is positioned over the 1/4" hole, with the wire trailing between the other four (4) holes. Nylon ties through the other holes fasten the light sensor wire to the housing. A drop of epoxy on the back of the light sensor holds it firmly in position.
Before drilling holes in the lamp house, we like to perform an experiment:
With the light source removed from the enlarger, set up MetroLux and the lamp on a work surface. Unwind the light sensor and plug it into MetroLux. Turn MetroLux to the Cal mode, Memory 3. (See CALIBRATION) Turn on the lamp, 'Focus' key. Take the light sensor's eye and point it at your lamp. Watch the number displayed on MetroLux change as the light sensor sees more the light.
What we look for is three things--a comfortable place to put the light sensor, a place where the light is fairly uniform, and a place where the number displayed is greater than 10. You'll find that all numbers between 10 and 127 work fine.
Thursday, April 5, 2007
MetroLux II Instructions, Intro and Buttons
MetroLux II®
Owner's Manual.
The MetroLux II® Darkroom Lamp Controller by Metered Light.
Before using the unit please read the Owner's Manual.
You can then easily install, configure & operate the unit properly.
Warning:
To prevent fire or shock hazard do not expose this product to any type of moisture.
This equipment is intended to be electrically grounded. Your MetroLux II® is equipped with a 3-wire ground plug---a plug that has a third (grounding) pin. This plug will fit only a grounded AC outlet. This is a safety feature. If you are unable to insert the plug into the outlet, contact a licensed electrician to replace the outlet with a properly grounded outlet. Do not defeat the purpose of the grounding plug!
Please read instructions before plugging in and observe power ratings for this unit. The MetroLux II® Darkroom Lamp Controller is rated to switch lamps up to 720 Watts/120volts. DO NOT EXCEED THIS POWER LEVEL.
Damage to MetroLux II may occur.
The MetroLux II® Darkroom Lamp Controller is internally fused.
Introduction:
A premiere compensating exposure timer for photographic printmaking, the MetroLux II® Darkroom Lamp Controller monitors the intensity of your printing lamp at the lamp source during the exposure, and adjusts for the output fluctuations of the lamp by shortening or extending exposure times proportionately. MetroLux II® integrates time/light to count light units (lux).
For temperature sensitive coldlights, the closed-loop MetroLux II® is dynamically more effective than voltage regulation systems in stabilizing repeatable exposures. And, MetroLux II® works with practically every lamp source under the sun... including the sun itself. We go outdoors with platinum printers to compensate for cloud cover during their sunlight exposures.
There are many advanced features and custom controls to personalize your MetroLux II® Controls exist to adjust metronome sounds and LED brightness, Hold and Reset functions, exposure range and counting styles. There is even a shutter timer function accurate for measuring your camera shutters into the sub-milliseconds. And, when using the optional MetroLux II® Remote Sensor, you can make easel-top readings. But more about that later. Don't be put off by the size of this owner's manual. There are many capabilities of your new MetroLux II® , but the basic functions are easy to grasp.
Unpacking:
Carefully remove the unit from the packing carton making sure not to toss out any accessories you may have ordered such as footswitches or the Remote Sensor. Check for photo sensor (on 10ft. cord), or 3 pin din jack adapter for Zone VI heads. Operating manual and warranty cards should be included.
DISPLAY (+): Sets the numeric display.
Press either key to change one count. [Hold and the display will count
continuously. Hold both DISPLAY keys down for 'turbo' mode and the
display counts fastest. The first key pressed determines direction.
EXPOSE: Quick click to Start exposure, or, to reset clock during exposure.
Click to start exposure. During exposure: click again to reset exposure, or hold 1 second until exposure holds. Click EXPOSE again to resume a held exposure. A footswitch can be added to the EXPOSE function. (Outlet on back panel.)
[Hold EXPOSE to stop clock during exposure without resetting time.]
Power Switch: Turns MetroLux II On/Off.
Also reboots MetroLux when turned on while holding SETUP key.
Back Panel Outlets:
Enlarger plug outlet for printing lamp. (Do not exceed 720 Watt rating). Unit is internally fused with a slo-blo 10A fuse. (220 Volt units are fused with slo-blo 5A fuses.)
Two 1/4" phono plug outlets for optional footswitches. Duplicates functions of FOCUS and EXPOSE keys on front panel.
RCA Jack, Lamp Sensor to printing head.
Mini-jack, for optional MetroLux II Remote Sensor hookup.
Wednesday, April 4, 2007
MetroLux II Instructions, Calibration and Printing
MetroLux II®
Calibration
MetroLux II® compensates for printing lamp fluctuations only when connected to a photo sensor viewing the lamp. If you don't have a sensor installed, please see 'Installing a Sensor'.
Connect the AC cord from your printing lamp into the AC outlet on the MetroLux II® back panel. Connect the photo sensor cord of your printing lamp into the RCA jack on the MetroLux II®
Calibrating the printing lamp with your MetroLux II® can be done very simply with Automatic Calibration. If you don't like automatics, a Manual Calibration procedure is available.
Automatic Calibration: (Use on cold lights only.)
Hold SETUP until Calibration mode is entered (indicated by "CAL" appearing on display. LED lights will indicate LUX 1 and CAL).
Click FOCUS. The printing lamp will turn on and its intensity value will be represented numerically on the MetroLux II display. This number will change as the lamp warms up. The lamp will be allowed to stabilize for two minutes after which the intensity value is automatically stored to memory, the printing lamp will shut off, and MetroLux II will return to LUX 1. Proceed to print.
Lux 2 can also be automatically calibrated in the same manner. After entering Calibration, press SETUP once to indicate the LUX 2 channel. Proceed as above.
Manual Calibration:
Hold SETUP until the Calibration mode is entered. The LUX 1 LED will light. If you chose to enter a calibration value into the LUX 2 channel, press SETUP again to move to LUX 2.
Click FOCUS. The printing lamp will turn on and its intensity value will be represented numerically on the MetroLux II® display. When you see the calibration value you wish to enter, hold SETUP until calibration mode is exited. The printing lamp will turn off as MetroLux II® enters the printing mode.
To manually install a specific calibration number, enter Calibration mode. Leave lamp off. Use DISPLAY keys to enter desired number.
Exit Calibration by holding SETUP until MetroLux II® returns to printing mode. Exiting the calibration mode enters your new calibration value to memory.
Keeping Notes
Calibration Range:
Good calibration values range from 10-900. If your numbers are too low, try repositioning the photo sensor closer to the lamp. If they are too high, move the sensor further from the lamp. If this is not possible, a neutral density gel can be fitted over the sensor.
Printing With The MetroLux II®
The MetroLux II® Darkroom Lamp Controller has three printing modes: LUX 1, LUX 2, and TIME. It operates as a compensating exposure timer when in the LUX 1 or LUX 2 printing modes. It operates as a standard timer in the TIME printing mode. To use the unit as a compensating timer in LUX 1 or 2, a photo sensor must be attached to the printing lamp (See Pg. 7-1) and the lamp must be calibrated (See Pg. 3-1).
Compensated Printing (LUX Modes)
This is the usual printing mode used by most MetroLux II® owners.
Use MetroLux II® in the LUX modes just like you would use any other timer, only remember, the numeric display indicates exposure times in LUX units. (One LUX equals one second of time when the lamp is operating at the same intensity as when it was calibrated.) Use [+ keys to adjust exposure values. A second LUX channel is available to use as a convenient place to store calibration values for a 2nd printing lamp, contact printers, or alternate settings on variable contrast heads.
Uncompensated Printing (TIME Mode)
MetroLux II® counts seconds like a normal timer. Photo sensor installation is not required for operation in the TIME mode.
Percentaging (For Drydown and Exposure Control)
Percentaging can be utilizied for any of the 3 printing channels: LUX 1, LUX 2, & TIME.
Click MEMORY key until the % LED is lit.
Set the display to desired percentage using [+ keys. All exposure values (Lux or Seconds) will be factored by the percent displayed.
Click MEMORY key again until your exposure value reappears. The % LED remains lit indicating that exposures displayed will now be factored by a percentage.
Percentaging is most commonly use in applying dry-down factors (best explained in Ansel Adams' book, The Print). Our abridged definition of "dry-down": Photographic printing papers become slightly darker as they dry, most noticeably in the highlights of the print. To determine the value of this dry-down effect, expose a normal print . If it looks good wet, print another 5% lighter. As this second print dries, if it matches your wet print, your dry-down factor is 5%. (Typical dry-down factors range from 1-11%.) Set MetroLux II® percent factor to 95% to compensate for 5% dry-downs.
When the percent factor is other than 100%, the % LED remains lit. Exposures can be factored with this function from 25 to 250%. The latitude of the percent allows printers more than one f/stop of relative exposure control in either direction.
Handling Two Enlargers
Though MetroLux II® comes equipped with a single AC outlet, a duplex AC junction box with 3-way switch can be built for less than $10 and make switching between lamps a breeze. Simply plug both enlargers into the junction box outlets, use an RCA male to dual RCA female Y-adapter (available at Radio Shack) to accomodate two photo sensors simultaneously. (Since only one lamp is ever lit at one time, only the lit lamp will be monitored.) Store calibration on lamp #1 in CAL 1 and calibration on lamp #2 in CAL 2. To switch from lamp 1 to 2, throw switch on the AC junction box and set MetroLux II® from LUX 1 to LUX 2.
Tuesday, April 3, 2007
MetroLux II Instructions, Customizing and Shutter Speed Testing
MetroLux II®
Customizing the MetroLux II®
Scroll through the options stack by clicking MEMORY once for each choice.
Use [+ keys to make selections in each option.
A......Audible Metronome?
Choices Selection
A11 Beep on during both Focus and Expose modes.
A01 Beep off in Focus mode, on in Expose mode.
A00 Beep off in both modes.
A10 Beep on in Focus mode, off in Expose mode.
B......Beep Duration/Pitch
This control has two facets, beep duration and beep pitch. Toggle between with the EXPOSE key. The beep will sound in this mode and changes can be heard immediately.
C...... Count Factors
MetroLux' 3-digit display can time exposures in three ranges.
Choices: 0.1 0.5 1.0 10
Range: 0.1-99.9 0.5-99.5 1-999 10-9990
D......Display Brightness
Use [+ keys. Up for brighter, down for dimmer. (Use Turbo mode (see Display, pg. 2-3) as the steps are very small) The display always shows "d88".
E....... Eliminate Memories
Choices Selection
E-3 All print mode memories open.
E-1 Only primary print mode memory open: Memory #1 and %.
F...... Remote Sensor Integration Time
Affects "light-gathering" interval of MetroLux II® Remote Sensor. (See Integration pg. 6-5)
To leave the Customization mode, hold MEMORY until the display goes blank. MetroLux II® will return to the printing channel last used.
Shutter Timing
Use MetroLux II® Darkroom Lamp Controller to measure camera and lens shutter speeds.
Hold SETUP until MetroLux II® enters CAL mode. Click SETUP twice more. LED indicators will light up next to Time and Cal. The letters "SPd" will read out on the display. Place the shutter to be timed on the MetroLux II® front panel centered over the "o" in the word "MetroLux II®" (If you look closely, you will see a hole inside the "o".)
Shine a light directly into the shutter. It's best not to use fluorescent roomlights as their cycle may generate faulty readings on shutter speeds faster than 1/60th of a second. (Your enlarger can be used if bright enough. By lowering the enlarger and removing the lensboard, enough light for this procedure can usually be acquired. The FOCUS key is still active at this point in the procedure to enable the enlarger lamp.)
Time shutter: click EXPOSE. The "SPd" display will change to "---". Trip shutter. MetroLux II® will display the shutter speed in milliseconds (one-thousandth of a second.)
To convert fractional shutter speed times into milliseconds:
Simply divide 1000 by the bottom integer of your shutter speed.
Example: 1/2 sec. 1000÷2=500 milliseconds
Speeds slower than 1 second are displayed in seconds. Upper limit is 6.55 seconds.
Problems?
If "---" display does not change after tripping shutter:
-increase or decrease the amount of light falling through the shutter.
Clear display to "---" by clicking EXPOSE.
Electronic flash can be timed by firing the stobe in the room. Pointing the flash into the hole is not necessary or recommended. This would saturate the sensor and could make a false reading adding extra microseconds. (Time your TV remote control if you're bored.)
To exit Shutter Time mode, hold SETUP.
Monday, April 2, 2007
MetroLux II Instructions, Using the Remote Sensor, MRS
MetroLux II®
Calculating new exposure times while resizing print:
Position the MRS on the easel with the crosshairs in a bright area of the image just printed. Click NULL. The display will blink the exposure time used on the prior print. Now resize and focus the image. Position the MRS in the exact same area of the image as measured during the first NULL. Click NULL again. MetroLux II® recalculates a new exposure time, loads it into memory and returns automatically to the printing mode.
Calculating new f/stop while resizing print:
Activate MRS, mode 1. Position the MRS on the easel with the crosshairs in a bright area of the image just printed. Hit NULL. The display will blink with the exposure time used on the prior print. Remember that time. Now resize and focus the image. Reposition the MRS in the exact same area of the image as measured during the first NULL. Notice that the exposure time has changed. Watching the MetroLux II® display, adjust the lens f/stop until your old exposure time reappears on display. Hit NULL key to finish procedure and return to printing mode.
Maintaining same exposure time while resizing print:
Printers may want to use the MRS resizing features in combination with the Percentage mode on the MetroLux II®. Before activating the MRS, enter the Percent mode by hitting the MEMORY key until the % light is lit. Activate MRS, mode 1. Select bright area of image. NULL. Resize and refocus. Reposition MRS to first NULL area. Notice that the percentage has changed from 100%. Watching the MetroLux II® display, adjust lens f/stop until 100% returns.
Aborting during resizing:
You can cancel out of the MRS mode at any time prior to the second NULL by using the SELECT key. The old exposure time is saved and MRS operations are aborted.
Error Messages:
If after the first NULLing a "2LO" prompt appears, it is recommended that you select a brighter area of the projected image to measure and start MRS operations over again. If this does not eliminate the "2LO" prompt, you may want to increase the sensitivity of the MRS. This is done through your Customized Options. See "Integration Settings"
Selecting and Memorizing a Gray Tone
Tone matching can help you eliminate some test strips getting you one step closer to a final print. Before tones can be matched, one must be memorized. There are at least two methods:
Step-Wedge Method:
Make a step-wedge of grey values: Size the enlarger for a standard print size (ie. 8 x 10, 11 x 14). With no negative in the enlarger, expose a piece of paper at the appropriate f/stop for a range of times that will include your preferred printing time. Example: If 15 seconds is your preferred printing time, find the f/stop that creates a step wedge with a good range of grays from white to black at exposure times of 3, 6, 9, 12, 15, 18, 21, 24, and 27. Use the dry step wedge to record exposure times on corresponding gray steps. Save for later visual references.
Memorize tone.
With 15 entered in the MetroLux II® display, position the MRS sensor on the easel (no negative in the enlarger.) Select MRS, mode 2 by pressing SELECT key twice. Hold down the MetroLux II EXPOSE key as you press the MRS NULL key. (This is a tandem procedure: the EXPOSE key must be held as the NULL key is pressed or the calibration value will not be memorized.) After releasing both keys, the print time will blink. Press SELECT or NULL to exit the tone memorization procedure.
Print Method:
Make a good full-tone work print from a familiar negative. Viewing a dried workprint, select a gray tonal value for the MetroLux II® Remote Sensor to memorize.
Memorize tone. With the exposure time of the work print still entered in MetroLux II®,
Select MRS, mode 2 by pressing SELECT key twice. Position the MRS sensor on the easel under area of negative corresponding to chosen gray value of workprint. Hold down the MetroLux II EXPOSE key as you press the MRS NULL key. (This is a tandem procedure: the EXPOSE key must be depressed as the NULL key is hit or the calibration value will not be memorized.) After releasing both keys, the print time will blink. Press SELECT key to exit.
Matching the Memorized Tone
Always start by loading MetroLux with exposure time used during memorization. Set up new negative for printing. Select MRS, mode 2 by pressing SELECT key twice. Place the MRS sensor on image area to be gray-matched. Press NULL key. The MetroLux II® will blink with values for the areas the MRS is reading. Move the MRS to other areas and you will see the display change accordingly. When settled on a selection, press NULL. MetroLux automatically installs the new exposure time, turns the lamp off and returns to printing mode.
Error messages:
If values selected produce readings too low or too high, MetroLux II® will display "2lo" or "2hi", work with a brighter or darker area of image, or adjust the sensitivity of the MRS . (See "Integration Setting").
Sunday, April 1, 2007
MetroLux II Instructions, Installation
MetroLux II®
INSTALLING A SENSOR:
MetroLux II® was designed to overcome the problems of light output fluctuations associated with coldlight printing lamps. We watch the light while you print, correcting for fluctuations. It works fine with all light sources that do not exceed the 720 watt power requirement. Certain precautions must be followed when installing the probe:
* While installing the probe, be sure the light source you're working on is electrically disconnected from all power sources.
* Always strain relief the probe such that a tug from the outside cannot damage the tube or other parts of the printing lamp.
* Tie probe wire out of the way. As the enlarger moves up and down, be sure that the probe wire is not pulled or damaged.
* Avoid exposing probe or wire to heat. If it's too hot to touch, it's too hot for the probe (probe temperature range is -15° to 140°F). With some quartz and tungsten lamps, the probe wire will need to be mounted on the outside of the housing, away from heat. In this case, the probe can view the light through a small hole drilled near the source.
* The probe's-eye-view is very sensitive to changes in position. The probe should have a clear view of the printing lamp and not be allowed to move.
Sound pretty complicated? It's very simple. We've installed many probes in all kinds of lamps without problems. If you have problems, drop us a line.
For Coldlights.
Below is an installation technique we have used for the Aristo D-2 coldlight, the most common coldlight. If you have another type, these instructions should provide enough general information for fitting your coldlight with a sensor. Read the instructions through once before starting. Simple tools and a little smarts can perform the operation.
Tools:
pencil, masking tape, screwdriver, electric drill with 1/8" and 3/8" bits.
1. Disconnect the power chords and remove the coldlight head from your enlarger.
2. Mark the relative orientation of the cap and bottom of the coldlight with a pencil.
3. Remove two small screws on sides of coldlight. Lift the cap off the coldlight.
4. Mark the location on the cap where the hole will be drilled. It must be located on the top such that the probe wire will clear the transformer beneath the cap.
5. Drill the hole with 1/8" bit and then widen the same hole with the 3/8" bit.
6. Clean the hole of any burrs and remove shavings from inside the lamp housing from inside the lamp housing.
7. Feed the probe wire through the hole in the cap. Now pass the probe end through the opening on the fluorescent tube mount board towards the tube itself.
8. Look closely at the probe and note which side "sees". It is the side with the shiny square eye. With eye away from fluorescent tube, strap wire to the tube near the center of the cold light grid with nylon cable ties at both 1/4" and 1" distance from probe. From here the sensor can see the 'average intensity' of the light. Pull snug and clip away the excess ties.
9. Realign cap on lamp; spin in the screws.
10. With the lamp reassembled, take up slack in probe wire by gently pulling excess wire out of cap. Take the strain relief (the strain relief is the odd-shaped, black thing in the plastic bag that the probe came in) and with the wire laid into the larger piece, force the other side in so that it clamps ('pinches') the probe wire. Use a pair of pliers to squeeze and snap this strain relief through hole
Probe strain relief, and close-up of assembly, in coldlight lamp house.
MetroLux II®
TUNGSTEN & QUARTZ LAMP INSTALLATIONS
As a means of fastening the light sensor to some tungsten and quartz lamp houses, we have used the hole pattern shown below. With these holes, the probe is positioned over the 1/4" hole, with the wire trailing between the other four (4) holes. Nylon ties through the other holes fasten the light sensor wire to the housing. A drop of epoxy on the back of the light sensor holds it firmly in position.
Before drilling holes in the lamp house, we like to perform an experiment: With the light source removed from the enlarger, set up MetroLux II® and the lamp on a work surface. Unwind the light sensor and plug it into MetroLux II®. Set MetroLux II® to the Cal mode. Hit FOCUS to turn on lamp. Take the light sensor's eye and point it at your lamp. Watch the number displayed on MetroLux II® change as the sensor sees more light.
We look for three things in choosing a sensor location--a comfortable place to put the light sensor, a place where the light is fairly uniform, and a place where the number displayed is greater than 10. You'll find that all numbers between 10 and 900 work fine.
After finding the appropriate mounting location, end experiment by holding SETUP.
Other installation examples to mount your sensor:
Variable Contrast Coldlights:
MetroLux II® is designed for compensating for ouptut variations on single grade lamp sources. With a few considerations, it can also be used on variable contrast tubes with great success. Best results will occur when the sensor is attached to the Green tube looking at the Blue tube. This evens out the readings from the Green tube, which is 2-3 times brighter than the Blue tube. You can monitor the effects of your placement by switching between Green light only and Blue light only during the Calibration procedure. Best printing results occur when Green readings are similar to Blue readings.
It is also suggested that you choose a middle contrast setting to calibrate. This way the output variations on contrast changes will not be as large a swing from your calibrated value.
Many printers using the MetroLux II® on their VC coldlights are calibrating their LUX 2 channel for the highest contrast setting.
Subscribe to:
Posts (Atom)
Pocket Spot

Metering in the Office, 10 2/3 EVs
Pocket Spot
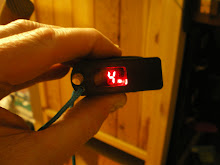
Metering in the Office, 4 1/3 EVs