MetroLux II®
Calibration
MetroLux II® compensates for printing lamp fluctuations only when connected to a photo sensor viewing the lamp. If you don't have a sensor installed, please see 'Installing a Sensor'.
Connect the AC cord from your printing lamp into the AC outlet on the MetroLux II® back panel. Connect the photo sensor cord of your printing lamp into the RCA jack on the MetroLux II®
Calibrating the printing lamp with your MetroLux II® can be done very simply with Automatic Calibration. If you don't like automatics, a Manual Calibration procedure is available.
Automatic Calibration: (Use on cold lights only.)
Hold SETUP until Calibration mode is entered (indicated by "CAL" appearing on display. LED lights will indicate LUX 1 and CAL).
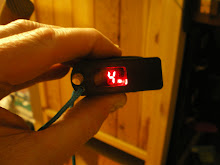
Click FOCUS. The printing lamp will turn on and its intensity value will be represented numerically on the MetroLux II display. This number will change as the lamp warms up. The lamp will be allowed to stabilize for two minutes after which the intensity value is automatically stored to memory, the printing lamp will shut off, and MetroLux II will return to LUX 1. Proceed to print.
Lux 2 can also be automatically calibrated in the same manner. After entering Calibration, press SETUP once to indicate the LUX 2 channel. Proceed as above.
Manual Calibration:
Hold SETUP until the Calibration mode is entered. The LUX 1 LED will light. If you chose to enter a calibration value into the LUX 2 channel, press SETUP again to move to LUX 2.
Click FOCUS. The printing lamp will turn on and its intensity value will be represented numerically on the MetroLux II® display. When you see the calibration value you wish to enter, hold SETUP until calibration mode is exited. The printing lamp will turn off as MetroLux II® enters the printing mode.
To manually install a specific calibration number, enter Calibration mode. Leave lamp off. Use DISPLAY keys to enter desired number.
Exit Calibration by holding SETUP until MetroLux II® returns to printing mode. Exiting the calibration mode enters your new calibration value to memory.
Keeping Notes
Calibration Range:
Good calibration values range from 10-900. If your numbers are too low, try repositioning the photo sensor closer to the lamp. If they are too high, move the sensor further from the lamp. If this is not possible, a neutral density gel can be fitted over the sensor.
Printing With The MetroLux II®
The MetroLux II® Darkroom Lamp Controller has three printing modes: LUX 1, LUX 2, and TIME. It operates as a compensating exposure timer when in the LUX 1 or LUX 2 printing modes. It operates as a standard timer in the TIME printing mode. To use the unit as a compensating timer in LUX 1 or 2, a photo sensor must be attached to the printing lamp (See Pg. 7-1) and the lamp must be calibrated (See Pg. 3-1).
Compensated Printing (LUX Modes)
This is the usual printing mode used by most MetroLux II® owners.
Use MetroLux II® in the LUX modes just like you would use any other timer, only remember, the numeric display indicates exposure times in LUX units. (One LUX equals one second of time when the lamp is operating at the same intensity as when it was calibrated.) Use [+ keys to adjust exposure values. A second LUX channel is available to use as a convenient place to store calibration values for a 2nd printing lamp, contact printers, or alternate settings on variable contrast heads.
Uncompensated Printing (TIME Mode)
MetroLux II® counts seconds like a normal timer. Photo sensor installation is not required for operation in the TIME mode.
Percentaging (For Drydown and Exposure Control)
Percentaging can be utilizied for any of the 3 printing channels: LUX 1, LUX 2, & TIME.
Click MEMORY key until the % LED is lit.
Set the display to desired percentage using [+ keys. All exposure values (Lux or Seconds) will be factored by the percent displayed.
Click MEMORY key again until your exposure value reappears. The % LED remains lit indicating that exposures displayed will now be factored by a percentage.
Percentaging is most commonly use in applying dry-down factors (best explained in Ansel Adams' book, The Print). Our abridged definition of "dry-down": Photographic printing papers become slightly darker as they dry, most noticeably in the highlights of the print. To determine the value of this dry-down effect, expose a normal print . If it looks good wet, print another 5% lighter. As this second print dries, if it matches your wet print, your dry-down factor is 5%. (Typical dry-down factors range from 1-11%.) Set MetroLux II® percent factor to 95% to compensate for 5% dry-downs.
When the percent factor is other than 100%, the % LED remains lit. Exposures can be factored with this function from 25 to 250%. The latitude of the percent allows printers more than one f/stop of relative exposure control in either direction.
Handling Two Enlargers
Though MetroLux II® comes equipped with a single AC outlet, a duplex AC junction box with 3-way switch can be built for less than $10 and make switching between lamps a breeze. Simply plug both enlargers into the junction box outlets, use an RCA male to dual RCA female Y-adapter (available at Radio Shack) to accomodate two photo sensors simultaneously. (Since only one lamp is ever lit at one time, only the lit lamp will be monitored.) Store calibration on lamp #1 in CAL 1 and calibration on lamp #2 in CAL 2. To switch from lamp 1 to 2, throw switch on the AC junction box and set MetroLux II® from LUX 1 to LUX 2.
Subscribe to:
Post Comments (Atom)
Pocket Spot

Metering in the Office, 10 2/3 EVs
Pocket Spot
Metering in the Office, 4 1/3 EVs
No comments:
Post a Comment